


Endura Flap Vinyl Sliding Glass Dog Door
- Regular price
- $646.00
- Sale price
- $646.00
- Regular price
-
- Unit price
- per


- Specifically designed for vinyl sliding glass doors with 1-1/2" thick 'U'-shaped tracks
- Energy-efficient with 3/16" clear safety glass and magnetic flap seal, tested to -40°F and winds up to 50 mph
- Available in four flap sizes (Small to Extra Large) and three standard track height ranges
- Semi-permanent, spring-loaded design for easy installation and removal, ideal for renters and vacation homes
- Secure steel-grade locking cover included for added safety
- Made in the USA, engineered for durability and performance
 Product Details
Product Details
The Endura Flap Vinyl Sliding Glass Dog Door is a premium solution designed for vinyl sliding doors with 1-1/2" thick tracks. Built for seamless integration, it offers your pet independence without compromising your home's energy efficiency. Available in four flap sizes, from Small to Extra Large, and three adjustable height ranges, it ensures a perfect fit for your sliding glass door.
Crafted with 3/16" clear safety glass—59% thicker than standard glass—this door enhances insulation and reduces energy loss. The environmentally friendly polyolefin polymer flap remains flexible even at -40°F and seals tightly with magnets to block winds up to 50 mph. The sturdy locking cover adds an extra layer of security when needed.
Installing this pet door is effortless, thanks to its spring-loaded, semi-permanent design. Simply insert the panel into the track, tighten the screws, and enjoy the convenience of a pet-access solution without cutting into walls or doors. Removal is just as easy, making it ideal for rental properties and vacation homes.
With its durable construction and stylish white vinyl frame that complements your sliding door, the Endura Flap Vinyl Sliding Glass Dog Door offers the perfect blend of function, design, and energy efficiency. Engineered in the USA, it delivers quality, durability, and convenience you and your pet will love.


Size Chart
- Small 6" w x 11" h
- Medium 8" w x 15" h
- Large 10" w x 19" h
- Extra Large 12" w x 23" h
Flap Dimensions:
6" w x 11" h
The entry way your dog goes through.Overall Panel Width
10 7/16"
How wide your panel is.


Step-Over Height
3"
The distance from the bottom of the panel to the bottom of your flap.Flap Dimensions:
8" w x 15" h
The entry way your dog goes through.Overall Panel Width
12 1/2"
How wide your panel is. Step-Over Height
3 3/10”
The distance from the bottom of the panel to the bottom of your flap.Flap Dimensions:
10" w x 19" h
The entry way your dog goes through.Overall Panel Width
14 1/2"
How wide your panel is.


Step-Over Height
6 3/8"
The distance from the bottom of the panel to the bottom of your flap.Flap Dimensions:
12" w x 23" h
The entry way your dog goes through.Overall Panel Width
16 5/8"
How wide your panel is. Step-Over Height
6 3/8"
The distance from the bottom of the panel to the bottom of your flap.| Flap Size | Flap Dimension | Step Over Height | Overall Panel Width | Recommended Pet Height |
|---|---|---|---|---|
| Small | 6" w x 11" h | 3" | 10 7/16" | 9" -14" |
| Medium | 8" w x 15" h | 3" | 12 1/2" | 9" - 21" |
| Large | 10" w x 19" h | 6 3/8" | 14 1/2" | 9" - 32" |
| Extra Large | 12" w x 23" h | 6 3/8" | 16 5/8" | 9" - 38" |
The recommended pet width is generally 1" – 2" added to the width of the flap. Step-Over is non-adjustable for all vinyl Endura Flap panels.
Track Height Adjustment Range is the measurement of your door height from the lowest point of your track to the highest point. Review our Track Measuring Guide for more information. The Endura Flap Vinyl Sliding Glass Dog Door comes in two adjustable ranges:
- Short: 74 3⁄4" – 77 3⁄4"
- Regular: 77 1⁄4" – 80 1⁄4"
- Tall: 93 1⁄4" - 96 1⁄4"
If your measured track height is near the bottom of the adjustment range then you should review A Note of Caution.
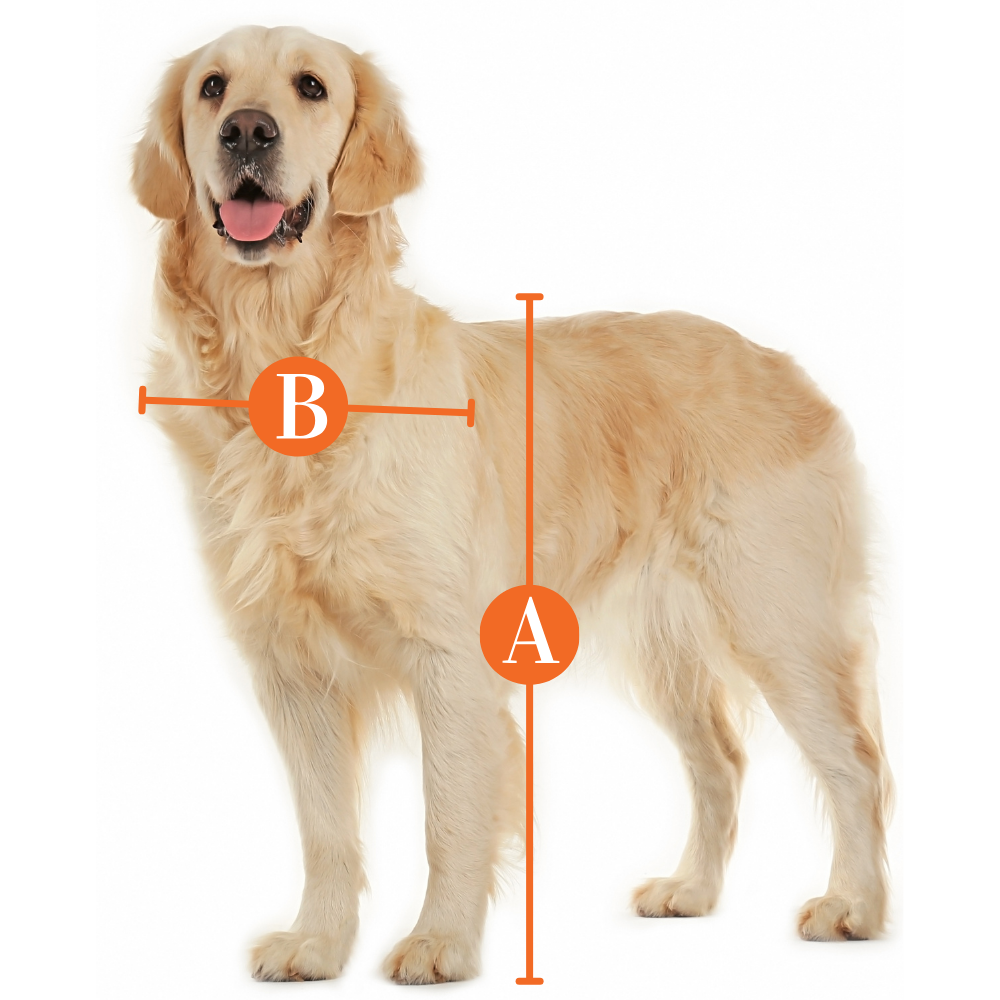
Find The Best Pet Door Size For My Pet

A
Pet Height: inches
B
Pet Width: inches
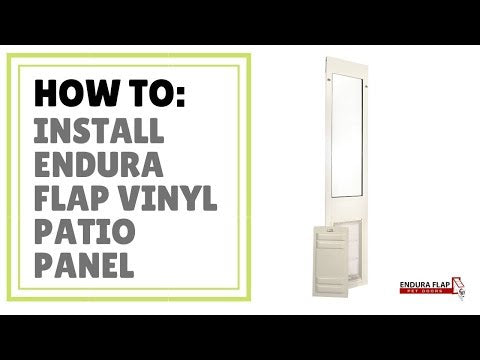
Installation Instructions
One-Piece Panel
 Difficulty
Easy
Difficulty
Easy
 Steps
05
Steps
05
 Time Required
0.5 hours
Time Required
0.5 hours
 Sections
01
Sections
01
 Flags
01
Flags
01
Parts
- 1 Vinyl Panel Pet Door
- 1 Weatherstrip Seal Roll
- 1 Center Post Weather Seal Draft Stopper
- 1 Sliding Door C-Clamp Lock
Tools
- Flathead screwdriver
Please read instructions & notes thoroughly before installation.
Step 1 Unlock Spring Mechanism

- Loosen the height adjustment locks at the top of the pet panel with the screwdriver. This allows the spring mechanism to move freely up and down.
Step 2 Insert Panel Into Track

- Insert the panel into the upper track of your door frame, push the panel into the spring mechanism, then swing the bottom of the panel up and over the threshold into the lower track rail.
Step 3 Apply Weatherstrip
Step 8 Apply the Weatherstripping


- Once you're sure the panel fits, remove it from the frame and lay it on its side on the ground.
- For foam weatherstripping: Peel the backing off the foam weatherstripping. Press it along both edges of the panel, trimming as needed with scissors to ensure a snug fit.
- For rubber weatherstripping: Clean the edge of your sliding door or window with rubbing alcohol to help the weatherstripping stick properly. Starting at the top or bottom, peel and press the strip into place with the folded edge facing indoors—align angled cuts if you have two pieces. For best results, apply the seal to the sliding door or window, but it can go on the pet door panel if needed.
Step 4 Place Panel In Track

- Place the panel back into the sliding glass door, then tighten the height adjustment locks to lock it in place.
Step 5 Install the Draft Stopper

- The center post weather seal strip (draft stopper) should be installed on the inside of the home.
- Trim with scissors as needed. Clean the edge of your patio door with rubbing alcohol before installing to assure a good seal.
- Repeat step two to install the panel in your track.
Sectional Panel Installation Instructions
 Difficulty
Easy
Difficulty
Easy
 Steps
06
Steps
06
 Time Required
0.5 hours
Time Required
0.5 hours
 Sections
01
Sections
01
 Flags
01
Flags
01
Parts
- 1 Vinyl Panel Pet Door
- 1 Weatherstrip Seal Roll
- 1 Center Post Weather Seal Draft Stopper
- 1 Sliding Door C-Clamp Lock
Tools
- Flathead screwdriver
Please read instructions & notes thoroughly before installation.
Two-Piece Panel
Step 1 Assemble the Panel


- Align the aluminum connectors extending from the bottom flap panel section with the top glass panel section.
- Press the aluminum connectors into the holes at the bottom of the top glass panel section.
- Ensure locking cover & height adjustment locks are on the same side!
- Fasten the two panels together using the four flathead screws found in the panel packaging.
Step 2 Loosen Height Adjustment Locks
- Loosen the height adjustment locks at the top of the panel. This allows the spring mechanism to move freely up and down.
Step 3 Insert Panel Into Track
- Insert the panel into the upper track of your door frame, push the panel into the spring mechanism, then swing the bottom of the panel up and over the threshold into the lower track rail.
Step 8 Apply the Weatherstripping
- Once you're sure the panel fits, remove it from the frame and lay it on its side on the ground.
- For foam weatherstripping: Peel the backing off the foam weatherstripping. Press it along both edges of the panel, trimming as needed with scissors to ensure a snug fit.
- For rubber weatherstripping: Clean the edge of your sliding door or window with rubbing alcohol to help the weatherstripping stick properly. Starting at the top or bottom, peel and press the strip into place with the folded edge facing indoors—align angled cuts if you have two pieces. For best results, apply the seal to the sliding door or window, but it can go on the pet door panel if needed.
Step 5 Place Panel In Track
- Place the panel back into the sliding glass door, then tighten the height adjustment locks to lock it in place.
Step 6 Install the Draft Stopper
- The center post weather seal strip (draft stopper) should be installed on the inside of the home.
- Trim with scissors as needed. Clean the edge of your patio door with rubbing alcohol before installing to assure a good seal.
- Repeat step two to install the panel in your track.
Lock Details

Since you cannot lock your sliding door to your panel pet door, we have provided you with alternative locking methods to secure your home:
Installing the sliding door clamp: This clamp has a screw that tightens by hand to prevent the sliding door from moving beyond the clamp’s placement. For doors manufactured with the glass slider on the inside track, the lock can usually be installed on the door’s raised track.
If you aren’t able to use the lock that comes with the panel: A great alternative to locking your sliding glass door is a Charley bar or dowel in the track. Both work off the same concept – they block the slider from opening. When engaged you cannot pull the sliding door away from the pet door panel.

Other Installation Options
Semi-Permanent Installation:
You might choose to secure the panel in your track with screws. This can be done by drilling screws at an angle in the top and bottom tracks. We recommend doing this from the outside to minimize damage to the sliding glass door frame. One-way screws will prevent tampering or removal of the panel from the outside.

Stationary Panel:
Some stationary sliding door panels can be unfastened and moved over to one side so that you can install the pet door panel between the jamb and stationary panel.
Avoid damaging your sliding glass door by checking that your door can move and that you can reinstall it properly before trying to uninstall the unit.
You will still lose space in your slider to move through, however, you will be able to use your existing sliding door lock to secure your home. Installing your pet door this way is also great in that you already have an alarm system in place.
If your sliding glass door slides on the outside track, using an alternative lock might not be possible, so this allows you to still lock your door.
NOTE: You can do the stationary panel install with the regular spring actuator method – no need to screw it in.
FAQ
Warranty
Warranty Type: Lifetime
Duration: Lifetime of the product.
Coverage: Defects in materials and workmanship under standard regular use.
Exclusions:
Damage caused by misuse or not using the product as intended.
Improper installation.
Damage caused by chewing.