


Endura Flap Pet Door For Doors
- Regular price
- $414.00
- Sale price
- $414.00
- Regular price
-
$414.00 - Unit price
- per


$414.00 .
- Compatible with interior and exterior doors 1-1/8" to 1-3/4" thick for single flap models or 1-5/8" to 2-3/8" for double flaps.
- Magnetic sealing on three sides for wind resistance up to 50 mph and energy-efficient insulation.
- Durable aluminum frame in white, black (bronze), or tan, blending seamlessly with your home's design.
- Flexible, polyolefin polymer flap resists warping and remains functional down to -40°F.
- Taller, narrower flap design suits multi-pet households, accommodating pets of varying sizes.
- Secure steel-grade locking cover ensures your home's safety when the door is not in use.
- Built in the USA, backed by a Lifetime Warranty and easy 90-day returns.
 Product Details
Product Details
The Endura Flap Pet Door for Doors offers premium performance for pet access without compromising insulation or style. Designed for interior and exterior doors, it accommodates single flaps for doors up to 1-3/4" thick and double flaps for doors 1-5/8" to 2-3/8" thick. Its sleek, durable aluminum frame is available in white, black (bronze), or tan, blending effortlessly into any home decor.
Engineered for extreme climates, the polyolefin polymer flap withstands temperatures as low as -40°F without warping, while the magnetic seal along three sides blocks drafts and wind gusts up to 50 mph. Even in the coldest of climates, the Endura Flap Pet Door has exceeded expectations, keeping drafts and cold air out, while remaining easy to clean and able to withstand active pets running through at full speed.
The flap’s taller, narrower design is ideal for multi-pet households, allowing pets of different sizes to share one door.
The customizable magnet strength offers flexibility for pet training and insulation value. More magnets can be added to increase the windproof seal, while magnets can also be removed to make the flap lighter for timid pets.
Security is paramount, and the included heavy-duty locking cover—equivalent to 16-gauge steel—keeps your home safe when the door isn’t in use.
Built with premium materials and backed by a Lifetime Warranty, the Endura Flap is designed to withstand active pets and harsh weather conditions for years to come. Experience the difference of a pet door that delivers durability, energy efficiency, and style in one high-performance design.
For doors less than 1-1/8" thick, check out the Endura Flap Pet Door for Thin Doors.
Please Note: If the magnets seem too strong for your pet, you can remove some of them to better suit their needs. On some sizes, they may need to be replaced for proper insulation. Refer to the video called Removing Side Magnets in the Videos section.


Size Chart
- Small Single Flap: 6"w x 11"hDouble Flap: 6"w x 10"h
- Medium Single Flap: 8"w x 15"hDouble Flap: 8"w x 14"h
- Large Single Flap: 10"w x 19"hDouble Flap: 10"w x 18"h
- Extra Large Single Flap: 12"w x 23"hDouble Flap: 12"w x 22"h
Flap Dimensions:
Single Flap: 6"w x 11"h
Double Flap: 6"w x 10"h
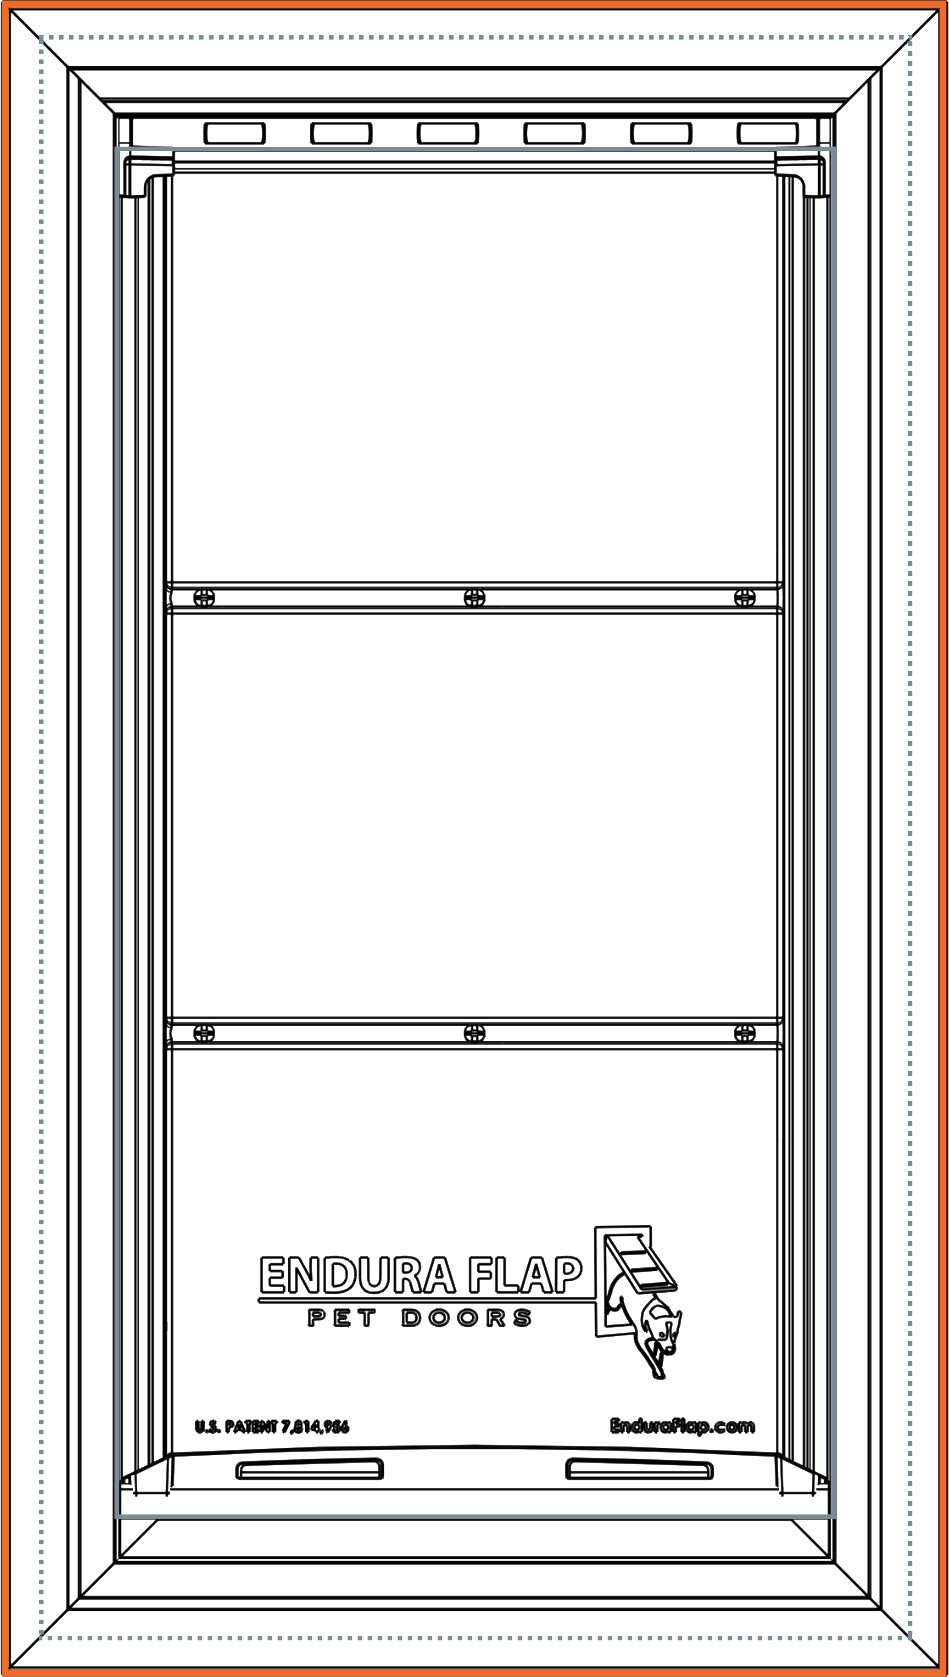
The entry way your dog goes through.Outside Frame Dimensions
10 1/8"w x 16 3/4"h
The outer edge of the pet door.


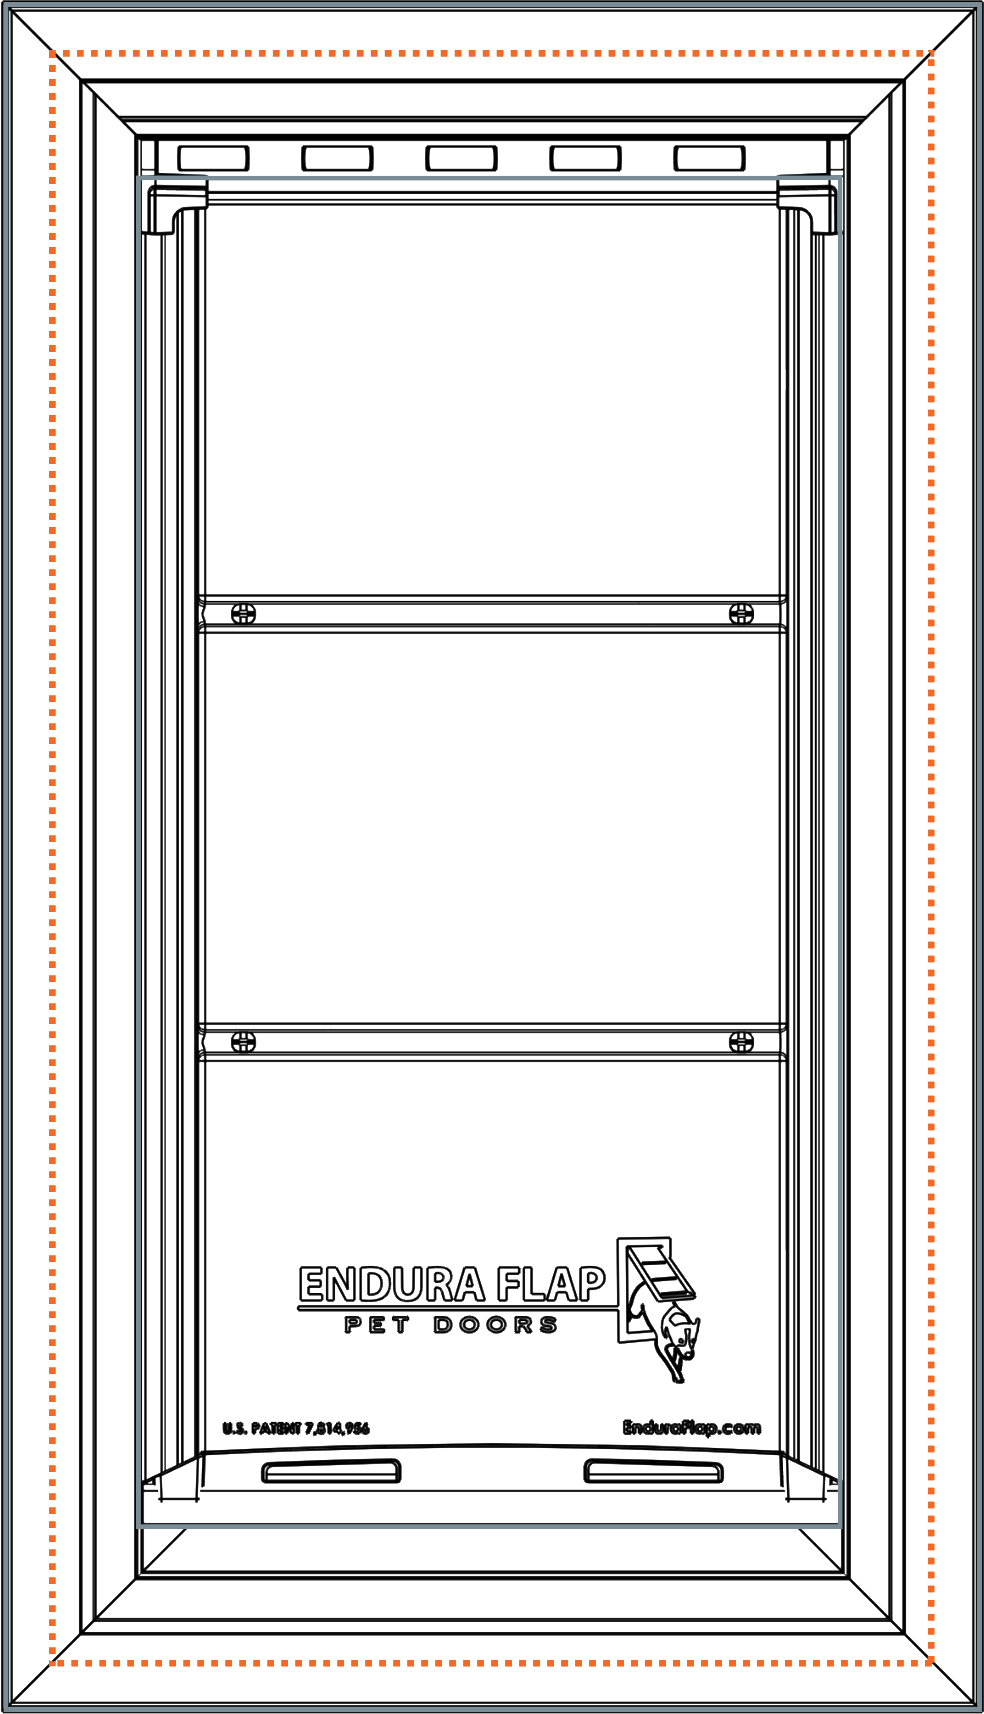
Rough Cut Out:
9 1/4" w x 15 1/8" h
The size of the hole needed to fit your pet door into your wall.Flap Dimensions:
Single Flap: 8"w x 15"h
Double Flap: 8"w x 14"h
The entry way your dog goes through.Outside Frame Dimensions
12 1/8" w x 20 13/16" h
The outer edge of the pet door.

Rough Cut Out:
11 5/16" w x 19 3/16" h
The size of the hole needed to fit your pet door into your wall.Flap Dimensions:
Single Flap: 10"w x 19"h
Double Flap: 10"w x 18"h
The entry way your dog goes through.Outside Frame Dimensions
14 3/16" w x 24 13/16"
The outer edge of the pet door.

Rough Cut Out:
13 3/8" w x 23 3/16" h
The size of the hole needed to fit your pet door into your wall.Flap Dimensions:
Single Flap: 12"w x 23"h
Double Flap: 12"w x 22"h
The entry way your dog goes through.Outside Frame Dimensions
16 1/4"w x 28 7/8"h
The outer edge of the pet door.


Rough Cut Out:
15 1/2" w x 27 3/16" h
The size of the hole needed to fit your pet door into your wall.| Flap Size | Flap Dimension | Rough Cut Out | Outside Frame Dimension | Recommended Pet Height |
|---|---|---|---|---|
| Small | (Single) 6" w x 11" h | 9 1/4" w x 15 1/8" h | 10 1/8" w x 16 3/4" h | 9" - 16" |
| (Double) 6" w x 10" h | 8" - 14" | |||
| Medium | (Single) 8" w x 15" h | 11 5/16" w x 19 3/16" h | 12 1/8" w x 20 13/16" h | 9" - 22" |
| (Double) 8" w x 14" h | 8" - 21" | |||
| Large | (Single) 10" w x 19" h | 13 3/8" w x 23 3/16" h | 14 3/16" w x 24 13/16" | 9" - 28" |
| (Double) 10" w x 18" h | 8" - 27" | |||
| Extra Large | (Single) 12" w x 23" h | 15 1/2" w x 27 3/16" h | 16 1/4" w x 28 7/8" h | 9" - 36" |
| (Double) 12" w x 22" h | 8" - 34" |
Number of Flaps:
- 1 - Single Flap: Flap on the inside of the wall (same side as locking cover).
- 2 - Double Flap: One flap on each side. The included dead-air-space and extra flap add significantly to the already considerable insulation and sealing values.
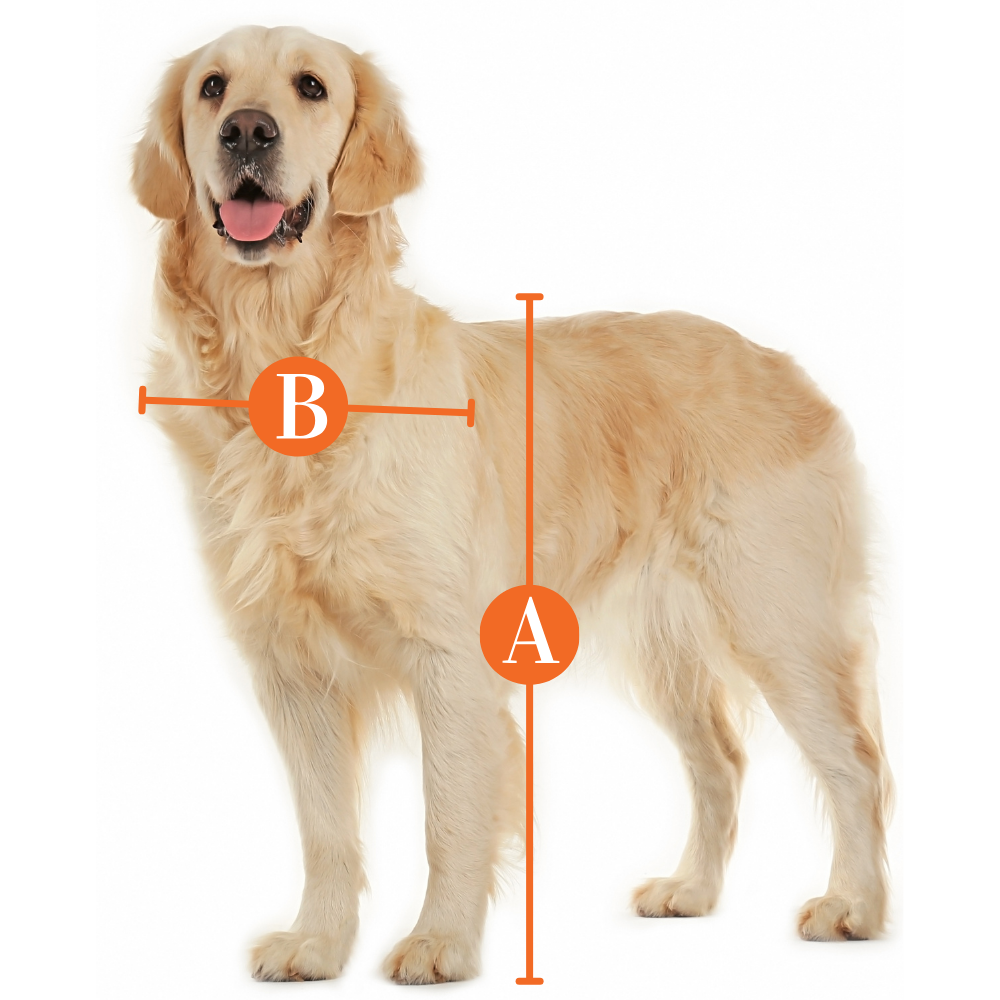
Find The Best Pet Door Size For My Pet

A
Pet Height: inches
B
Pet Width: inches
Installation Instructions
Single Flap Door Mount Instructions
 Printable Version
 Difficulty
  Steps
Steps  Time Required
  Flags
Flags Parts
- 1 Installation Template
- 4 Short Screws (1-1/2")
- 4 Medium Screws (2")
- 4 Long Screws (2-1/4")
- 4 Screw Covers
- 1 Installation Magnet
- 1 Flap Frame
- 1 Trim Frame
- 1 Tube of Silicone
- 1 Caulking Gun
- 1 Locking Cover
Tools
- Pencil
- Drill with 3/8" drill bit
- Level
- Measuring Tape
- Jigsaw or Reciprocating Saw
Please read instructions & notes thoroughly before installation.
Step 1 Prep Your Door


- If possible, remove the door from its hinges using a screwdriver and hammer to tap out the hinge pins. Lay the door flap for installation. Tape the provided template to the door. The top edge of the cut-out line should be at least 3" above the pet's shoulders.
Step 2 Drill the Holes

- Once you are certain the pet door will work with your door, make sure the template is level, and mark the outline with a pencil. Remove the template and drill holes through the corners just inside of the lines using a 3/8" drill bit.
Step 3 Saw An Opening


- Using a jigsaw, cut along the marked lines, making sure to cut straight.
Step 4 Check Weatherstripping


- Ensure the weatherstripping is firmly pressed in the groove on both frames. Weatherstripping indicated in red.
Step 5 Position the Frames


- Place the trim frame on the outside of the door and the flap frame on the inside.
Step 6 Position Screws


- Select appropriate screws and insert them into the pet door from the inside.
| Door Thickness | Screw Length |
|---|---|
| 1" to 1-1/4" | Short Screws (1-1/2") |
| 1-1/4" to 1-1/2" | Medium Screws (2") |
| 1-1/2" to 1-3/4" | Long Screws (2-1/4") |
Step 7 Screw Door Into Place

- Once the pet door is leveled, tighten the screws so that the weatherstripping compresses.
Step 8 Attach Screw Covers


- Push the four screw covers in by hand to cover the screws.
Step 9 Seal With Silicone

- Apply silicone where the two frames meet. Also apply silicone where the outside frame meets the door.
Double Flap Door Mount Instructions
Parts
- 1 Installation Template
- 4 Short Screws (2-1/4")
- 4 Long Screws (2-3/4")
- 4 Screw Covers
- 1 Installation Magnet
- 1 Inside Flap Frame (includes attached tunnel)
- 1 Outside Flap Frame
- 1 Sill Plate
- 1 Tube of Silicone
- 1 Caulking Gun
- 1 Locking Cover
Tools
- Pencil
- Drill with 3/8" drill bit
- Level
- Measuring Tape
- Jigsaw or Reciprocating Saw
Please read instructions & notes thoroughly before installation.
Double Flap Door Mount
Step 1 Prep Your Door
- If possible, remove the door from its hinges using a screwdriver and hammer to tap out the hinge pins. Lay the door flap for installation. Tape the provided template to the door. The top edge of the cut-out line should be at least 3” above the pet's shoulders.
Step 2 Drill the Holes
- Once you are certain the pet door will work with your door, make sure the template is level, and mark the outline with a pencil. Remove the template and drill holes through the corners just inside of the lines using a 3/8” drill bit.
Step 3 Saw An Opening
- Using a jigsaw, cut along the marked lines, making sure to cut straight.
Step 4 Place Sill Plate

- Rest the sill plate at the bottom of the cutout with the weather stripping facing up and the outer leg on the outside of the door.
Step 5 Caulk U Shape Tunnel

- Apply caulking to seal the tunnel to the inside frame.
Step 6 Check Weatherstripping
- Ensure the weatherstripping is firmly pressed in the groove on both frames. Weatherstripping ends on the side for the inside frame, while the outside frame has an open area at the bottom to allow water to flow outside down the sill plate. Weatherstripping is indicated in red.
Step 7 Position the Frames

- Place the inside frame with the tunnel on the inside of the door just resting on top of the sill plate weatherstripping. Take the exterior frame and place it on the outside of the door fitting inside the tunnel.
Step 8 Position Screws
- Select appropriate screws and insert them into the pet door from the inside.
| Door Thickness | Screw Length |
|---|---|
| 1-5/8" to 1-3/4" | Short Screws (2-1/4") |
| 1-3/4" to 2-3/8" | Long Screws (2-3/4") |
Step 9 Screw Door Into Place
- Once the pet door is leveled, tighten the screws so that the weatherstripping compresses.
Step 10 Attach Screw Covers
- Push the four screw covers in by hand to cover the screws.
- If need be, use the wooden end of a hammer rubber, or other non-metal tool to tap in the hole plugs. You can also place a wood block on the hole plug and tap the block with a hammer.
Step 11 Seal With Silicone
- Apply silicone where the two frames meet. Also apply silicone where the outside frame meets the door.
PANELED DOORS
The best way to install the pet door is to have it straddle the recessed area of one of the panels. Have the pet door sit on the flat area in the middle, side, and below the recessed panel. The frame will cross the recessed area on the top, so you will be left with a gap. The easiest way to fill this gap is to get battens or shims from a local hardware store, and cut them to fit. When that gap is mostly filled, caulk the remaining areas to seal the doggy door to the surface of the people door. If the space is very irregular you can also use a squishy foam weather stripping, which will compress down for a tight fit. When finished, use caulking to seal the door.
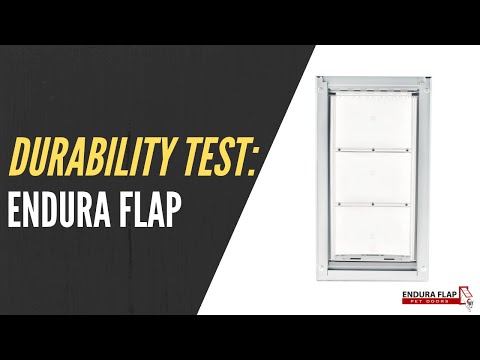
Videos
The Endura Flap Pet Door
Removing Side Magnets
Adjusting Your Endura Flap Magnet Strength
The Leaf Blower Test
FAQ
Warranty
Warranty Type: Lifetime
Duration: Lifetime of the product.
Coverage: Defects in materials and workmanship under standard regular use.
Exclusions:
Damage caused by misuse or not using the product as intended.
Improper installation.
Damage caused by chewing.
Customer Reviews
New & Improved Design (Staff Review)
The Endura Flap E2 Door Mount has the same great features as the original design with the addition of hidden hardware for an aesthetic look. Nice to have the option of a single or double flap to fit your insulation requirements.
High quality door
Worth the price. Love the magnetic close. We live in idaho where temperatures easily drop into the single digits (and below) during the winter. There is no draft and solid well made product.