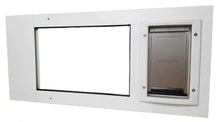
Patio Pacific Custom Sash Window Pet Door
- Fits sash windows with adjustable width that can be customized to your non-standard window
- Easy installation and removal with spring-loaded design
- Durable aluminum frame and plastic pet door for cats and small dogs
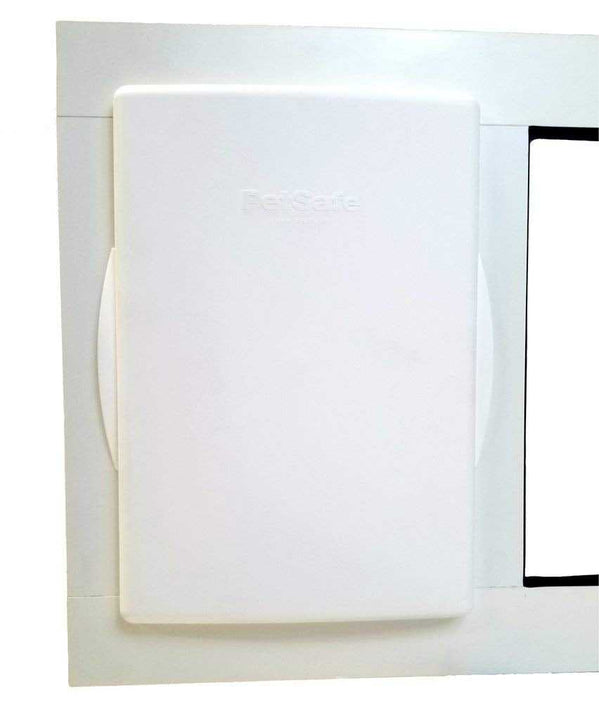
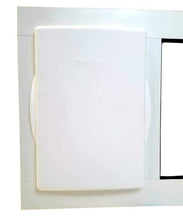
- Press-fit locking door cover included for controlled access
- Corrosion-resistant materials for long-lasting use
- Panels less than 22" will have plexiglass

Product Details
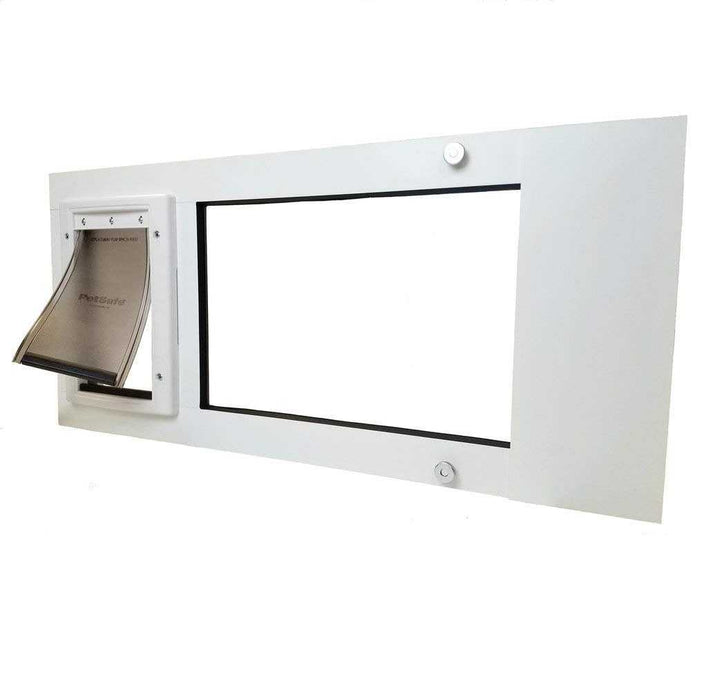
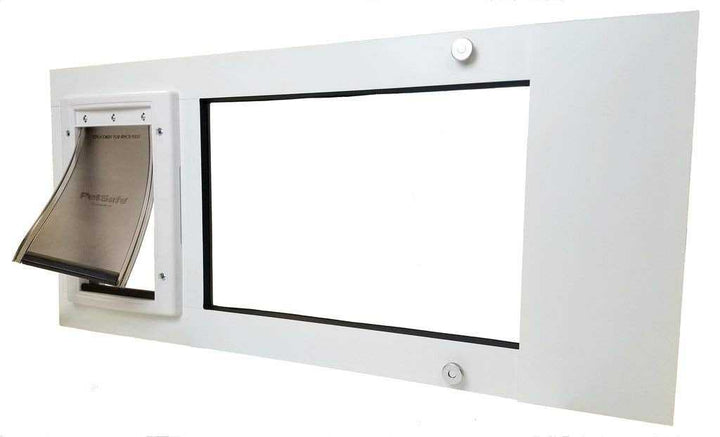
With a custom adjustable height ranges, the Sash Window Pet Door is designed to fit most sash windows. This innovative pet door solution allows your furry friends to come and go as they please, while keeping your home comfortable and secure.
Constructed with a durable aluminum frame and a plastic pet door, this window insert is perfect for cats and small dogs. The flexible tinted clear vinyl flap is lightweight, making it easy for pets of all sizes to use. The press-fit locking door cover gives you control over when your pet can enter or exit, while the corrosion-resistant materials ensure long-lasting performance.
Installing the Sash Window Pet Door is a breeze, thanks to its spring-loaded design that allows for installation and removal in just minutes. This makes it ideal for rentals or vacation homes, as it can be easily set up and removed as needed.
While this pet door is recommended for more mild climates due to its single pane tempered glass and moderate insulation value, it still offers average wind resistance and sealing value. Weather stripping is included to help minimize drafts.
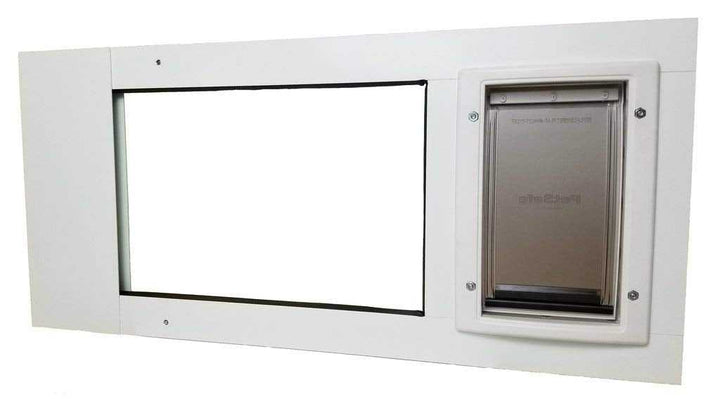
Designed with versatility in mind, the pet door can be moved to the right side if needed by unscrewing it and flipping the frame 180°. Make sure the adjustment screws and locking cover are on the same side when reinstalling.
Give your pets the freedom they deserve while maintaining the comfort and security of your home with the Sash Window Pet Door.
Features:
- Single pane tempered glass with tinted clear vinyl flap
- Lightweight flap for easy use by pets of all sizes
- Minimal impact installation into the window track
- Flap can be moved to the right side if desired
- Suitable for cats, large cats, and small dogs in temperate 3-season climates
- Minimum track width of 1 inch or greater is needed for this pet door frame.
Benefits:
- Easy installation in a matter of minutes, great for rentals or vacation homes.
- Lightweight flap is easy for pets of all sizes to use.
- Low-impact installation right into your window track.
Size Chart
Flap Dimensions:
5 1/8"w x 8 1/4”h
The entry way your dog goes through.

Height To Raise Window
15"
How high you must raise your window in order to fit the panel into the track.| Flap Size | Flap Dimension | Height to Raise Window | Recommended Pet height |
|---|---|---|---|
| Small | 5 1/8" x 8 1/4" | 15" | 6" - 12" |
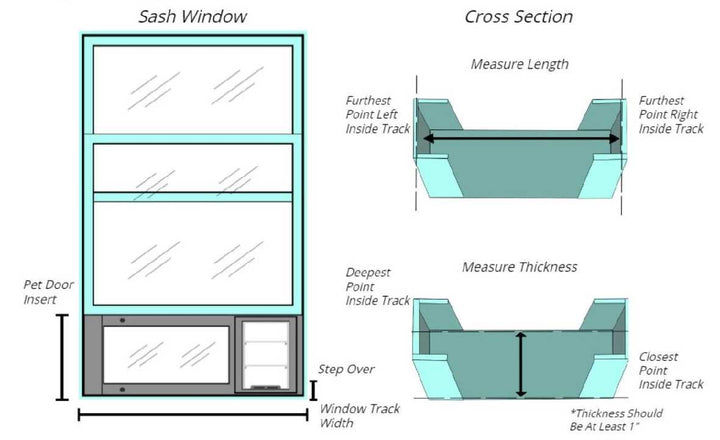
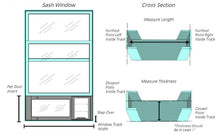
Pet door has 1" framing, measure your track width to make sure that your window will accommodate the sash.
Wondering how to measure your track? Review our Track Measuring Guide.
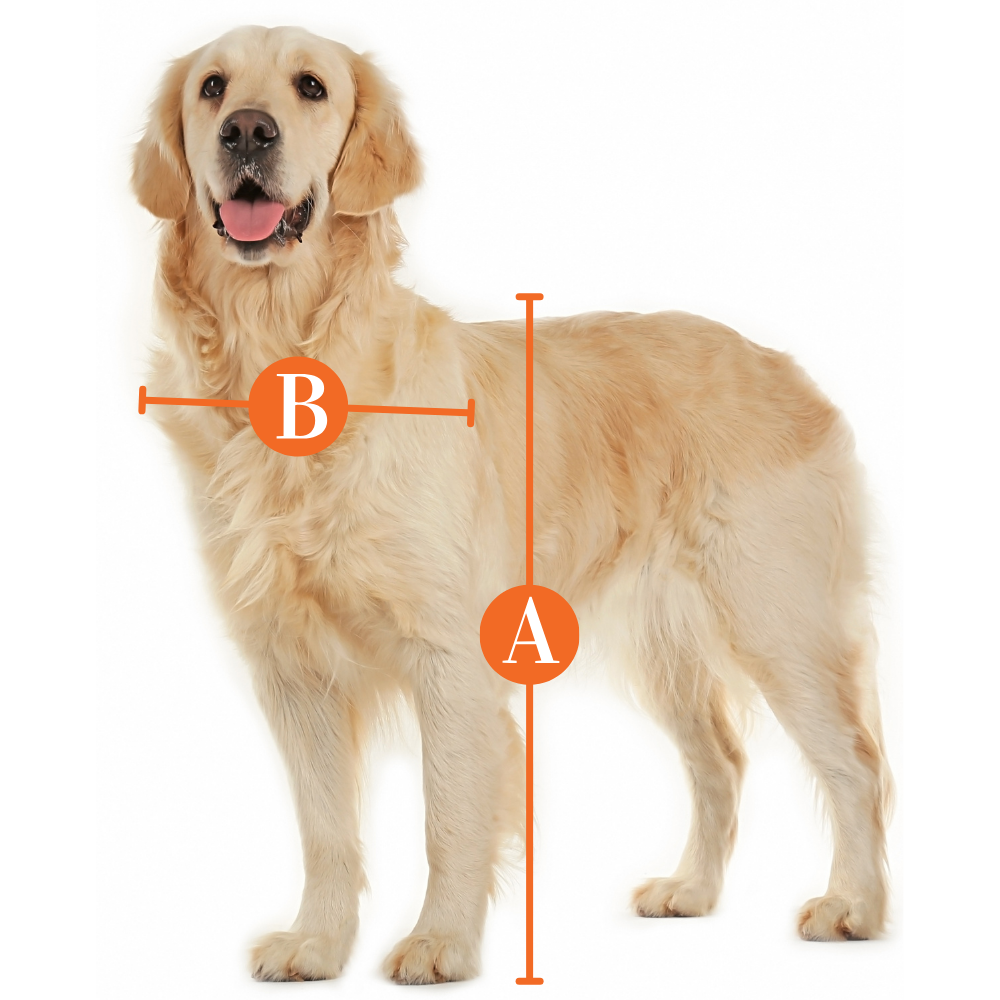
Do not know which flap size to get? Here is a measurement guide to help you out.
Find The Best Pet Door Size For My Pet

A
Pet Height: inches
B
Pet Width: inches
Installation Instructions
 Difficulty
Easy
 Steps
04
 Time Required
0.5 hours
 Sections
01
 Flags
00
Parts
- 1 Sash Window Panel
- Pet Door Locking Cover
- 1 Weatherstripping roll
Tools
- Flathead Screwdriver
Please read instructions & notes thoroughly before installation.
Step 1 Loosen Width Adjustment Locks

- Release the automatic width adjustment locks by loosening the screws with a screwdriver. This allows the spring mechanism to move freely from side to side.
Step 2 Test Fit the Panel

- Before applying weatherstripping, test installing the sash into your window track.
- Insert the sash into the window track. Push against the spring mechanism and swing the opposite end into the opposite window track.
- Gently release then tighten the width adjustment locks.
- It is important to test that the sash fits properly before applying the weatherstripping. If it sits properly, you can remove it to put on the foam weatherstripping in step 3.
Step 3 Apply Weatherstripping

- Apply the foam weatherstripping by peeling back the paper and exposing the adhesive.
- Unroll it along the edge of the sash, pressing to ensure it adheres.
- Install on both the top and the bottom. Trim to fit with scissors.
Step 4 Insert Into Track

- Place the sash back into the window, then tighten the width adjustment lock to lock it in place.
Sash Window Panel Tips
Adjusting the Pet Door for your Window
- Due to the fact that there are many types of windows, you may need to modify your installation using shims or similar materials, and depending on window design you may need to create a track with a quarter-round or 1" square wood strip.
- If there is a gap, you can use the shims to even out the pet door. A foam weather stripping can also be used around the edges for additional insulation.
Removing Your Sash Window Pet Door
- You will first need to loosen the width adjustment locks, you may first need to lift the pet door up to loosen the bottom screw.
- Then compress the window pet door and tighten the width adjustment locks once again for easy removal.
Removing the Press-Fit Closing Cover
- Step 1: Place thumbs in center of cover.
- Step 2: Place fingers on the back side of the wings sticking out of the sides of the cover.
- Step 3: Push with thumbs and Pull with fingers at the same time to unsnap the cover from the frame.
Lock Details
A great way to lock your sliding window is a Charley bar or screw in the track. Both work off the same concept - they block the slider from opening. When engaged you cannot pull the sliding door away from the pet door panel.
Switch the Side of the Flap
You can switch which side of the sash panel the pet door flap is on to best fit your home.
Step 1
- Remove the screws on the top and bottom closest to the edge of the pet door. Then slightly loosen the screws closest to the glass. Next, slide off the side piece, then the flap assembly.
Step 2
- Rotate the flap assembly (essentially flipping it upside down) then slide it back in. Make sure the locking cover is on the same side as the width adjustment locks.
Step 3
- Replace the end spacer and screws.
Videos
How to Measure Your Sash Window for a Pet Door
FAQ
|
What do I need to know/measure before I order? First raise up your window and check that it can go up far enough to be left with an opening 15" high. Next measure the width of the track from left to right, including going inside the track on both sides. Last measure how wide the track is that the window slides in (needs to be at least 1") |
|
How wide does the track have to be for the PetSafe Sash to fit? Track width needs to be at least 1" thick. |
|
Can I choose what side the door is on? It comes standard on the left, if you are looking from the inside of the house. You can switch it by taking out the pet door (needs a screwdriver) and flipping it upside-down. |
|
Will this door be good for more extreme weather? The pet door has flexible flap with a magnet on the bottom to help hold is shut. The glass is single pane for moderate insulation value, that said this is recommended for more mild climates or if you a simply on a fixed budget. You can also check out our full list of recommended extreme weather dog doors. |
|
My cat is having a hard time opening the flap is there something I can do that would make it easier? You can by removing the flap, although you would have a big open hole. Some electronic window cat doors open automatically for your cat, or at least have a light weight flap that is easy enough for them to push. Make sure you also check out our guide on training your cat how to use a cat flap. |
|
What if I mismeasured? If you've mismeasured, you may be able to fix it. To make your sash cat door about 3/4" wider, you may purchase a width extension (or make your own using 1" x lumber). To make your window kitty door insert slightly shorter you may trim the side flanges on the spring loaded adjustment piece with a hacksaw or a jigsaw with a metal cutting blade. |
|
How much does shipping cost? Shipping is calculated at checkout. |
Warranty
Warranty Type: One Year Non-Transferable Limited Warranty
Duration: Valid for one (1) year from the purchase date for the original retail consumer purchaser only.
Coverage:
Patio Pacific Inc. product will be free from defects in material or workmanship when subject to normal and proper residential use.
Labor and parts are covered for the first year of ownership.
In the event of a defect, Patio Pacific Inc. will replace the part with a new or refurbished part.
Exclusions:
Products represented as used, refurbished, or “as-is”, or not in the original packaging are not covered.
Warranty does not cover damage or defects caused by animals, commercial use, misuse, neglect, improper installation, use of non-PetSafe accessories, events beyond normal residential conditions, and any cause not involving manufacturing defects.
Does not cover labor for removal or installation of parts.
Customer Reviews

Size Chart
Flap Dimensions:
5 1/8"w x 8 1/4”h
The entry way your dog goes through.

Height To Raise Window
15"
How high you must raise your window in order to fit the panel into the track.| Flap Size | Flap Dimension | Height to Raise Window | Recommended Pet height |
|---|---|---|---|
| Small | 5 1/8" x 8 1/4" | 15" | 6" - 12" |
Pet door has 1" framing, measure your track width to make sure that your window will accommodate the sash.
Wondering how to measure your track? Review our Track Measuring Guide.
Do not know which flap size to get? Here is a measurement guide to help you out.
Find The Best Pet Door Size For My Pet

A
Pet Height: inches
B
Pet Width: inches
Installation Instructions
 Difficulty
Easy
 Steps
04
 Time Required
0.5 hours
 Sections
01
 Flags
00
Parts
- 1 Sash Window Panel
- Pet Door Locking Cover
- 1 Weatherstripping roll
Tools
- Flathead Screwdriver
Please read instructions & notes thoroughly before installation.
Step 1 Loosen Width Adjustment Locks

- Release the automatic width adjustment locks by loosening the screws with a screwdriver. This allows the spring mechanism to move freely from side to side.
Step 2 Test Fit the Panel

- Before applying weatherstripping, test installing the sash into your window track.
- Insert the sash into the window track. Push against the spring mechanism and swing the opposite end into the opposite window track.
- Gently release then tighten the width adjustment locks.
- It is important to test that the sash fits properly before applying the weatherstripping. If it sits properly, you can remove it to put on the foam weatherstripping in step 3.
Step 3 Apply Weatherstripping

- Apply the foam weatherstripping by peeling back the paper and exposing the adhesive.
- Unroll it along the edge of the sash, pressing to ensure it adheres.
- Install on both the top and the bottom. Trim to fit with scissors.
Step 4 Insert Into Track

- Place the sash back into the window, then tighten the width adjustment lock to lock it in place.
Sash Window Panel Tips
Adjusting the Pet Door for your Window
- Due to the fact that there are many types of windows, you may need to modify your installation using shims or similar materials, and depending on window design you may need to create a track with a quarter-round or 1" square wood strip.
- If there is a gap, you can use the shims to even out the pet door. A foam weather stripping can also be used around the edges for additional insulation.
Removing Your Sash Window Pet Door
- You will first need to loosen the width adjustment locks, you may first need to lift the pet door up to loosen the bottom screw.
- Then compress the window pet door and tighten the width adjustment locks once again for easy removal.
Removing the Press-Fit Closing Cover
- Step 1: Place thumbs in center of cover.
- Step 2: Place fingers on the back side of the wings sticking out of the sides of the cover.
- Step 3: Push with thumbs and Pull with fingers at the same time to unsnap the cover from the frame.
Lock Details
A great way to lock your sliding window is a Charley bar or screw in the track. Both work off the same concept - they block the slider from opening. When engaged you cannot pull the sliding door away from the pet door panel.
Switch the Side of the Flap
You can switch which side of the sash panel the pet door flap is on to best fit your home.
Step 1
- Remove the screws on the top and bottom closest to the edge of the pet door. Then slightly loosen the screws closest to the glass. Next, slide off the side piece, then the flap assembly.
Step 2
- Rotate the flap assembly (essentially flipping it upside down) then slide it back in. Make sure the locking cover is on the same side as the width adjustment locks.
Step 3
- Replace the end spacer and screws.
Videos
How to Measure Your Sash Window for a Pet Door
FAQ
|
What do I need to know/measure before I order? First raise up your window and check that it can go up far enough to be left with an opening 15" high. Next measure the width of the track from left to right, including going inside the track on both sides. Last measure how wide the track is that the window slides in (needs to be at least 1") |
|
How wide does the track have to be for the PetSafe Sash to fit? Track width needs to be at least 1" thick. |
|
Can I choose what side the door is on? It comes standard on the left, if you are looking from the inside of the house. You can switch it by taking out the pet door (needs a screwdriver) and flipping it upside-down. |
|
Will this door be good for more extreme weather? The pet door has flexible flap with a magnet on the bottom to help hold is shut. The glass is single pane for moderate insulation value, that said this is recommended for more mild climates or if you a simply on a fixed budget. You can also check out our full list of recommended extreme weather dog doors. |
|
My cat is having a hard time opening the flap is there something I can do that would make it easier? You can by removing the flap, although you would have a big open hole. Some electronic window cat doors open automatically for your cat, or at least have a light weight flap that is easy enough for them to push. Make sure you also check out our guide on training your cat how to use a cat flap. |
|
What if I mismeasured? If you've mismeasured, you may be able to fix it. To make your sash cat door about 3/4" wider, you may purchase a width extension (or make your own using 1" x lumber). To make your window kitty door insert slightly shorter you may trim the side flanges on the spring loaded adjustment piece with a hacksaw or a jigsaw with a metal cutting blade. |
|
How much does shipping cost? Shipping is calculated at checkout. |
Warranty
Warranty Type: One Year Non-Transferable Limited Warranty
Duration: Valid for one (1) year from the purchase date for the original retail consumer purchaser only.
Coverage:
Patio Pacific Inc. product will be free from defects in material or workmanship when subject to normal and proper residential use.
Labor and parts are covered for the first year of ownership.
In the event of a defect, Patio Pacific Inc. will replace the part with a new or refurbished part.
Exclusions:
Products represented as used, refurbished, or “as-is”, or not in the original packaging are not covered.
Warranty does not cover damage or defects caused by animals, commercial use, misuse, neglect, improper installation, use of non-PetSafe accessories, events beyond normal residential conditions, and any cause not involving manufacturing defects.
Does not cover labor for removal or installation of parts.


 Product Details

