Patio Pacific Horizontal Window Pet Door - Replacement Flap Instructions
Installation Instructions
 Difficulty
Easy
Difficulty
Easy
 Steps
04
Steps
04
 Time Required
0.5 Hours
Time Required
0.5 Hours
 Sections
00
Sections
00
 Flags
01
Flags
01
Parts
- 1 Petsafe "Classic" Replacement Flap
Tools
- Screwdriver
Please read instructions & notes thoroughly before installation.
Step 1 Identify Your Replacement Flap

- The correct replacement flap can be identified by the number of screwes located at the top of the flap.
| Flap Size | Number of Screws |
|---|---|
| Small | 3 |
| Medium | 4 |
| Large | 5 |
| Extra Large | 6 |
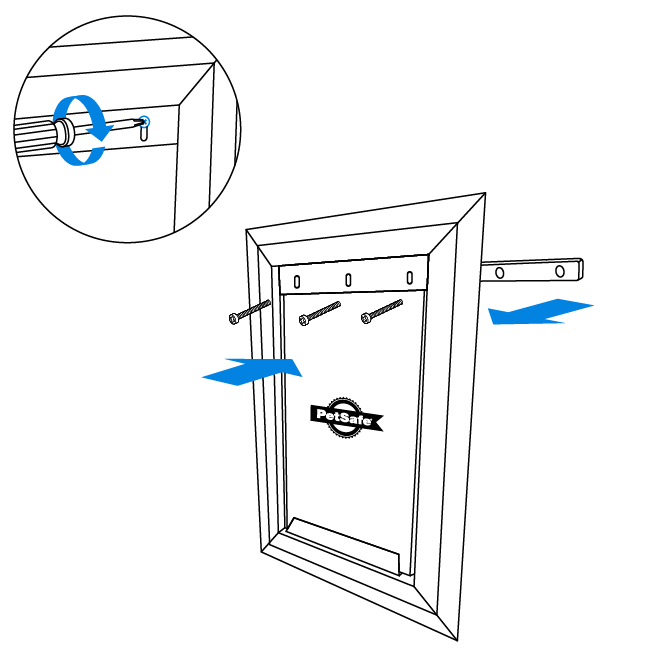
Step 2 Remove The Screws

- Twist the screws off the pet door frame and remove the current flap and back bar.
Step 3 Line Up The Flap

- Align the new flap behind the frame so the magnet on the bottom of the flap seals with the bottom of the frame.
Step 4 Screw In New Flap
- Hold the back bar in place to secure flap between the bar and the front frame. Twist the screws through the front of the frame to the back bar.